Ready to dive into resin art? It’s a fun and creative way to express yourself, and you don’t need to be a pro to get started. The beauty of resin is that you can make stunning pieces with just a few basic supplies. Plus, the process is super satisfying!
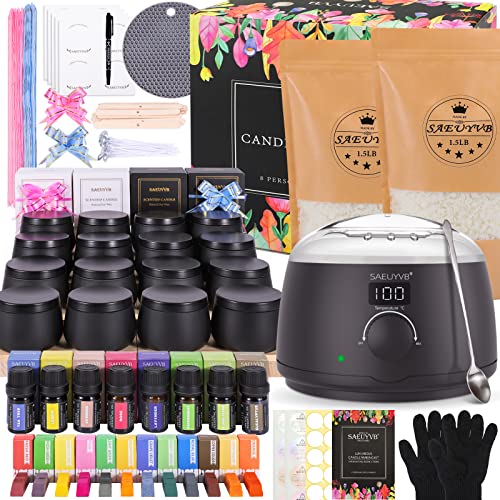
First things first, gather your supplies. You’ll need resin and a hardener, a mixing cup, stir sticks, and molds to shape your art. You can even play with color by adding pigments or dyes. The great thing is, you can start with a simple project like coasters or jewelry and slowly work your way up to more complex designs. Trust me, once you get the hang of it, you’ll be hooked!
Don’t forget about safety! Make sure to work in a well-ventilated area and wear gloves to protect your skin. It’s all about having fun, but it’s also important to keep things safe. Once everything is set up, you’ll mix your resin and hardener, add your colors, and pour it into your molds. Watch the magic happen as it cures and transforms into beautiful, shiny art!
As you start experimenting, don’t be afraid to make mistakes. Some of the best pieces come from unexpected surprises. Share your progress and get involved with the resin art community. There are tons of tips and tricks out there just waiting for you to discover. So, grab your supplies and let your creativity flow! You’re about to create some amazing resin art masterpieces.
Essential Tools for Resin Art
Getting started with resin art is exciting, but you need a few essential tools to make your projects shine. Here’s a quick list of what you’ll want to have on hand to dive into this creative journey.
First up is a high-quality resin kit. Look for a kit that includes both the resin and hardener in the right proportions. You want something that mixes well and cures clear. Check the reviews to find one that people rave about for its ease of use and dependable results.
Next, grab some mixing cups and stir sticks. You’ll need these to combine your resin and hardener. Choose clear mixing cups so you can see the levels and make sure you get the right measurements. Silicone stir sticks are a great choice because they’re easy to clean and reusable.
Don't forget about safety gear! Resin can release fumes, so gloves and a mask are a must to protect yourself while working. Ventilation is key too, so always work in a well-ventilated area or invest in a small fan to keep the air flowing.
Finally, you might want some colorants and additives. There are plenty of options like pigments, glitters, and even alcohol inks that can really bring your art to life. Just remember to start small with colors; you can always build up layers later! With these tools, you’ll be well on your way to creating beautiful resin art.
Step by Step Resin Art Techniques
Getting started with resin art can be super fun and a little bit messy, but that’s part of the excitement! First things first, gather your supplies. You will need resin, hardener, mixing cups, stir sticks, and some gloves to keep your hands clean. Don’t forget a heat gun or torch to pop those pesky bubbles!
Next, mix your resin and hardener according to the package instructions. This is a crucial step because the right ratio makes sure your piece cures properly. Pour the resin into a mixing cup, follow it with the hardener, and then give it a good stir for about 3-5 minutes. Take your time here to ensure everything blends together well.
Once your resin is mixed, it’s time to unleash your creativity! Pour it into your mold or canvas. You can layer different colors or add items like glitter or flowers right into the resin. Don't be afraid to play around with different techniques. Swirling the colors can create beautiful patterns, and you can even use a straw to blow the resin and create unique designs.
Now for the fun part: wait for it to cure! Usually, this takes 24 hours, but check your resin packaging, just to be sure. Once it's fully cured, you can demold it, and voila, you have your unique piece of art! Just remember, resin art takes practice, so keep experimenting and enjoy the process. You'll get the hang of it in no time!
Common Mistakes and How to Avoid Them
Starting with resin art can be super exciting, but it’s easy to mess up a few things along the way. Let's dive into some common mistakes you might face and how to dodge them!
One big mistake is not measuring the resin and hardener correctly. This can lead to situations where your art doesn’t set properly or becomes sticky. To avoid this, use a clear measuring cup. Follow the instructions closely, and it helps to double-check your measurements. It’s better to be safe than sorry!
Another common pitfall is thinking you can pour resin in just any old spot. Trust me, if you want a smooth finish, prep your surface well. Make sure it’s clean and level. Using a plastic sheet or drop cloth can help contain spills, and taping off edges prevents unwanted drips.
Popping bubbles can be a hassle, but it’s important for a flawless look. Don't just ignore them! Use a heat gun or a torch to carefully go over the surface after pouring. This will make those pesky bubbles disappear and give your art that perfect glossy finish.
Lastly, don’t rush the curing process. Tempting as it might be, touching or moving your piece too soon can ruin it. Make sure you give it the full cure time mentioned on the resin package. Patience really does pay off when you see the final product!